

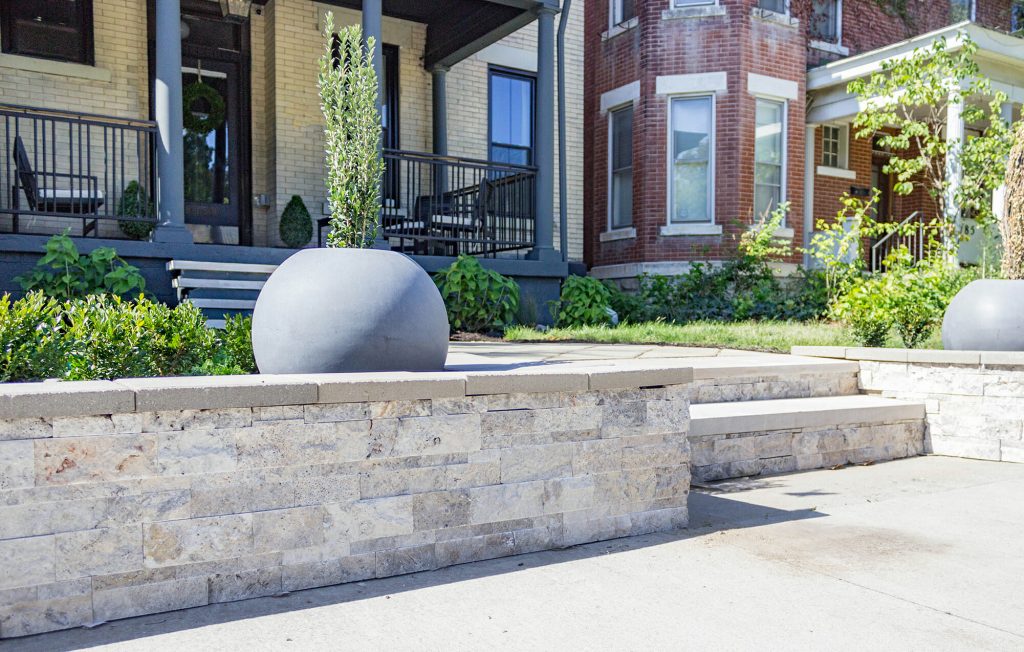
Pavers will always be a popular option for your outdoor area. They offer an inexpensive, durable and stylish solution that will look great for years to come.
These machines are hardly costly to maintain and easy to repair. What more could you want?
With pavers, installation is an important consideration. To maintain longevity and quality, you want to put in a lot of effort into the groundwork and leveling process.
Installing pavers is an easy task, but there are steps you need to follow properly so that it lasts long and becomes less of a hassle.
We’ve put together these instructions so that the installation process will go smoothly.
We’ll show you some key points about how to install pavers:
 Please take our step-by-step guide in order to understand what this is all about. Most of the work will be focused on leveling.
 Leveling the ground for pavers needs to be done before you even think about placing one.
If you want your paver work to be installed properly, you will need to place gravel underneath first, then sand. If you want it to sit flush with the existing surface, some extra digging will need to be done.
 Paving a surface typically starts by outlining the area, marking it to finished level height and then digging down from that point. Grit and sand is then laid as a foundation before installing restraint gates and finally laying the individual pavers as required.
You will need:
- Pavers
- Paver restraints
- Rope
- Strings
- You could use wooden stakes to prevent the movie from spilling over onto the floor.
- 12” steel spikes
- Gravel
- Sand
- A carpenter level
- A rubber mallet
- A nice straight lumber
- A straight edge
- A measuring tape
- A plate compactor
- A masonry saw
- Safety equipment
Step 1 – Where do you want your paver to be placed?
 Before you start, think of what you’ll need. You can use rope, spray paint or a hose. Make sure to outline your project so that you can see the shape before you start on it.
Step 2 – Creating your reference
Pound stakes around the outlined area at a predetermined height. Use string to outline a border and tie it tightly. You can use the strings to create leveling reference points for your work.
Step 3 – The string should be as level as possible before proceeding to the next step.
To make sure your pavers’ surfaces match the final height of the paver installation, you will leave a “string line” at that desired height. We will use this as a guide for digging and other operations like stepping and stamping blocks. Thus, it’s in your best interest to dig and level your ground properly.
Ensure the strings are straight and at the same height. Then create a slope of one inch to every four feet of length.
In order to determine the gradient for this slope, you have to measure from the side you want water flow from and estimate how steep the hill is. You can then adjust the strings accordingly.
You can check if your desk is level by using a bubble level creatively. For example, your bubble should always be off-center on the board, but in the same spot. To make sure of this, you may want to mark the level gauge with a piece of tape or any other way that suits you best for future use.
Step 4 – It’s time to dig
 First, you need to calculate the total depth of your paving project after deciding on how much gravel and sand to add. 4 inches of gravel or 3 inches of sand should be enough.
To determine the total depth needed, you can just add up the height of your pavers to the depth needed. For example, if your paver height is 6 inches and your required total depth is 13 inches, then you would need 9 inches worth of dirt for extra cushioning.
To make sure the ground stays in place, you may find it useful to purchase some edging. This will need to be dug in 13″ from the measurements you have taken.
Dig the soil to the needed depth using the strings as guides. Then use the plate compactor to pack down and smoothen out any remaining chunks.
Measure the distance between the soil and the string in many places to ensure there are no air bubbles. However, you shouldn’t be a perfectionist with this – plenty of time for that later!
Step 5 – Add crushed gravel
Drive a stake in the ground to mark the height limit for this mound. When comparing heights, use the measurement from the string and then downward.
It means that if we want to add 4 inches of crushed gravel, in our project the stakes should be pounded until they are spaced 9 inches (13 – 4) from the strings. Spread the reference stakes about 7 feet from each other
When finished, pile the crushed gravel. It’s important to make sure it is level by running a straight board through to make sure all of the gravel is at the same height as the stakes.
If you’ve levelled the stakes normally, the gravel should also be leveled.
Step 6 – Install paver edge restraints
Edge restraints are necessary for your project to avoid sand shifting, paver loosening, and holding the shape of your project over the years.
To anchor your project area, pound in 12″ spikes in a circle around the outside of the designated space.
These edges are offered in plastic, aluminum or steel. If you want to fit them to your project’s shape, you will have to fold and cut them.
Step 7 – Add sand
In a procedure similar to this, drive stakes through the area whose height will represent the total height of sand you will be adding.
Once again, level the stakes so they are commensurate with the reference strings. You will need to fill the area with sand so that nothing is left before pavers are added.
For the project, we need to maximize air and minimize congestion, which means that stakes need to be spaced 6 inches from strings.
The sand needs to be spread throughout the whole area and leveled with the stakes. The sand should be at the same height as the stakes.
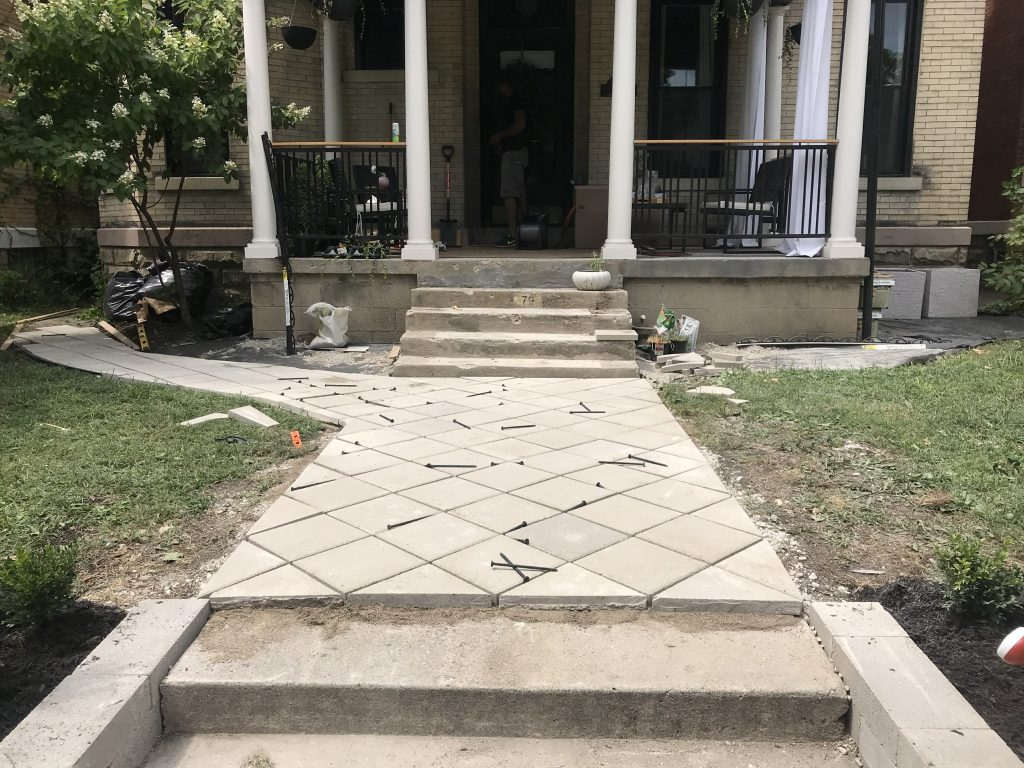
Step 8 – Lay the pavers
 Lay the paving stones in a 90-degree corner and along a line that would be the longest if following a pattern.
Place each individual paver at a 90° angle, pressing it down against the sand to keep everything together tightly. Do not drag pavers over the sand or stomp on them, as this will lead to sand shifts and may throw your level off.
It might be a good idea to avoid walking on the sand that is already leveled. You should walk on pavers, taking care not to step on those that are not yet surrounded or else you might shift the sand and undo your hard work.
To level the pavers, use a straight edge to check for uniformity. Tap softly with a rubber mallet if necessary.
Step 9 – Cut necessary pavers
You have to plan out your project carefully or you might have to cut a few pavers if the area you need them for is too big.
Put all the paving stones down you can and mark with chalk how much needs to be cut.
When cutting the pavers, make sure you are using the right safety equipment. Make one cut with a masonry saw in the perpendicular direction of the opposite side, before making two more cuts in line with it. Place cut pieces in their place after measuring their widths.
Step 10 – Ensure proper compaction
 To ensure all pavers are properly in place, use a plate compactor to tamp them into the sand. Make sure to go across your whole project area at least 3 times with the compactor.
Step 11 – Spread paver joint sand
 Spread a layer of paver joint sand (find out all about it following this link) over the entire area. Use a push broom to sweep all the sand into the gaps between the pavers. Consider using polymeric sand
You’re all set!
 Have you finished installing your paver patio yet? As we’ve seen, there can be some pitfalls and things that go wrong if you do it yourself. However, by following our guide and learning from the mistakes of others, you’ll hopefully finish without any challenges.
Common FAQs Answered
Is it cheaper to pour your own pavers?
This is an interesting question. You can save some money by pouring your own pavers, but you'll need to do some research first.
If you're looking for a quick answer, it's cheaper to pour your own pavers.
But before you start on this project, there are a few things to consider:
- What type of pavers are you looking to pour?
- What type of soil are you using?
- Is there a slope in the yard?
Can you lay pavers directly on dirt?
No, it is never a good idea to lay pavers directly on dirt. This can lead to the pavers not being level and the joints may not be flush.
If you want to install pavers on dirt, you will need to use a layer of compacted gravel or crushed stone first. This will provide a solid base for the pavers and help them stay level.
What do you put down before pavers?
This is a question with a lot of different answers. In some cases, you would put down gravel, but in other cases you might want to put down sand. It all depends on what you are trying to accomplish with the paver installation.
Can I install pavers in my yard by myself?
Yes, you can install pavers in your yard by yourself. If you are not confident in your DIY skills, it is recommended that you hire a professional to help with the installation process.
A professional can help you decide on the right size and shape of paver for your yard. They will also help you with the installation process and make sure that everything is installed correctly to prevent any future problems.
